


In this article we will see how boot Linux Mint into Recovery Mode or Advanced Boot Options if it fails to start normally.
Step 1: Why the mode is important
The mode is very useful and I was able to solve multiple critical issues during the years and saved important information for me. Several basic features and services are included into Recovery Mode. You will be logged in as a root user which allows you to fix and repair broken packages and the system as a whole.
Several options are available in Linux Mint Recovery mode:
- resume - Resume normal boot
- clean - Try to make free space
- dpkg - Repair broken packages
- fsck - Check all file systems
- grup - Update grup bootloader
- network - Enable networking
- root - Drop to root shell prompt
- system-summary - System summary
Step 2: Start Linux Mint with Advanced boot options
In order to start Linux Mint in Recovery mode you need to follow next steps:
- Power on the computer
- Wait the UEFI/BIOS to load - usually the logo of the manufacturer is shown
- Keep and Hold - Shift until you see the GNU GRUB menu (Advanced Options For Linux Mint 20 Cinnamon):
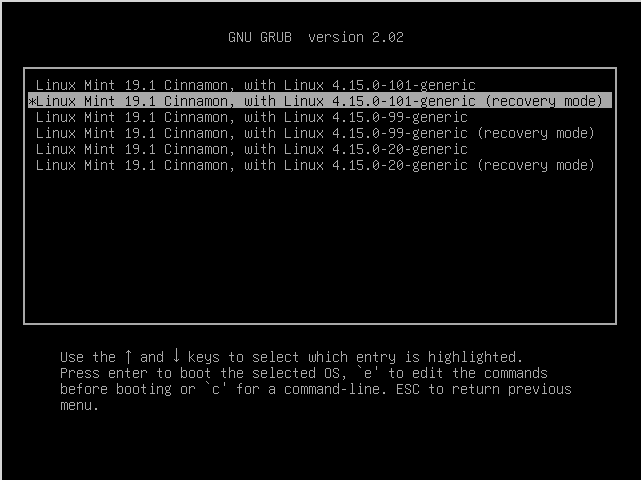
- Select a line with your prefered kernel version and Advanced options - this line will end with - (recovery mode)
In my case is:
Linux Mint 19.1 Cinnamon, with Linux 4.15.0-101-generic (recovery mode)
Note: The root partition is mounted as read-only. To mount it read/write, enter the command
mount -o remount,rw /
More info: RecoveryMode
Step 3: Recovery mode in Linux Mint
Once the selected kernel and mode are loaded you will see a window like the one below.
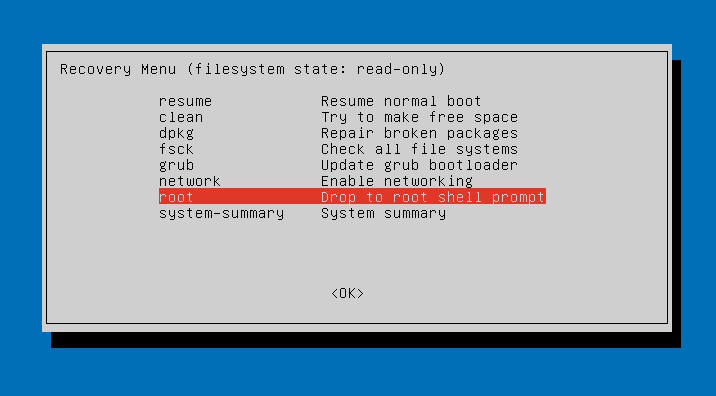
Below you can find the explanation for some of the available options:
- clean: Attempts to make free space on your file system. If your storage is full and this is causing some sort of problem, this can help free up space.
- dpkg: Repairs broken software packages. If a package failed to install properly and your system doesn’t work because of it, this may help.
- fsck: Performs a file system check, which scans the computer’s file systems for errors and automatically fixes them. It’s a bit like chkdsk on Windows.
- grub: Updates the GRUB boot loader. If you could use the GRUB boot loader to get to this menu, this option probably won’t help.
network: Enable networking, which is disabled by default in recovery mode. - root: Leaves the menu and goes to a root shell prompt. From here, you can mount the file system in write-mode and run commands that may help fix problems with the system. You should only do this if you know what you’re doing — it’s a way to fix the problem by hand if you know how.
If you are interested in fixing Linux Mint problem you can check these two articles: